EN
EN FR
FR PT
PT AR
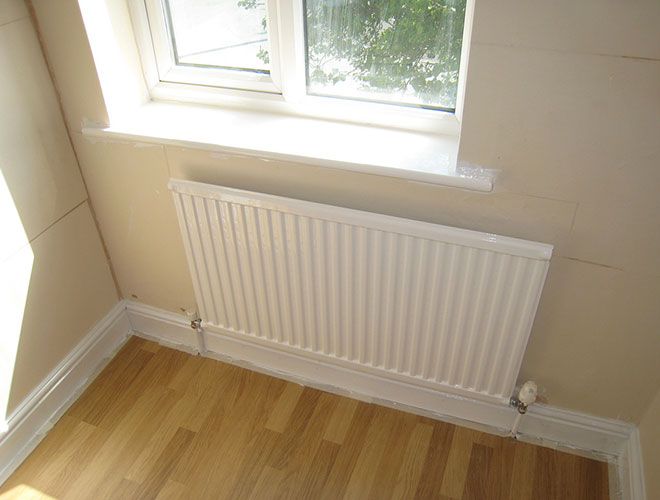
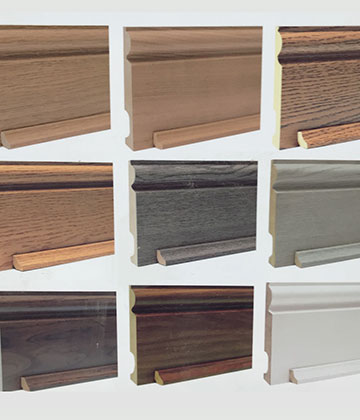
ARWhen decorating the house, the skirting board is indispensable. The skirting board can play a better decorative effect and make the details of the space look more perfect. And the existence of the skirting board can also play a role in protecting the wall, and there is no need to worry about fouling the wall in the later stage of cleaning. However, any decoration style for a long time will also make people tired of it, but it is too expensive and time-consuming to renovate the house. It is better to change the part of the house, such as changing the skirting board. If you don't want to damage the wall when you replace it, you must adopt the correct skirting board removing method. The following article will introduce you a step by step guide on removing skirting board without damaging the wall and how to choose the best skirting board.
Why Remove Skirting Boards?
- Skirting boards by their very nature are designed to take a fair bit of wear and tear; even so, they may have become tired or worn over time and be in need of replacement.
- It may well be the case you are renovating an older home or wanting to incorporate modern style to a dated home, removing and replacing skirting boards is an affordable way to add architectural and update the style.
- In some cases will need to remove and replace skirting boards when installing tiles flooring, laminate flooring or carpets.
- Skirting boards are often viewed as being the finishing touch to a decorating project and this is the optimal time to undertake the removal task.
Best Tools For Removing Skirting Board
Removing skirting boards is a quick and easy task providing you have the right tools to hand. With the listed tools, you’ll be able to get the job in no time!
- Stanley knife
- Hammer
- Chisel
Steps On How To Remove Skirting Boards Without Damage The Wall
Removing your old skirting board should be done with care, this is to reduce the risk of damaging the plaster especially outside the areas you are covering. Just follow theses skirting board removing steps.
1.Remove any cables and obstructions
To start off with remove any loose cable that is surrounding the old skirting board. You might have to remove some cable clips or any other debris which might be in the way of removing the skirting.
2.Loosen the skirting boards
Once all cables been removed, you need to run a Stanley knife down the back of the skirt board where it meets the wharf and remove any rock which might be keeping it stuck together. Next, you'll need to use the hammer and the chisel. Using the hammer, gently knock the chisel in between the wall and the skirting. This helps to loosen it away from the wall. Make sure you do this for the whole of the piece that you’re going to remove. You might have to do this a few times to make sure you’ve got a good deep cut.
3.Prying & removing skirting boards away from the wall
Take a screwdriver or a chisel and get in behind the board and using that piece of old scrap wood text the plaster when you above the where the skirting board is and try and leverage the board away. Using the wood above the scrap wood any leverage you might be doing against the wall. It’s protected, because any damage you might do below the line of the old skirt and its most likely be cut up by the new skirt, so we tend to try and aim to get all pieces off in one.
4.Remove remaining nails
Next, remove the any old nails which might effects fit in the new skirting board. In this case the nails were very firmly into the wall and which were various things to remove them. But we can’t which may damage the wall. We should knock the nails into and below the plaster, this is because we need a smoother finish for the skirting boards and chip away any excess cork which might be on the wall again, just give that smoother wall to apply to which go and run for this again with another piece. Run the Stanley knife across the skirting board again all the way down to the end of the wall. This will prevent damage to the plaster and also enable you to fit the new skirtings perfectly!
5.Getting on with the job
Now that your skirting boards have been successfully removed you are ready to get on with the job. Whether you are ready to level your floors or continue to laying your actual laminate it’s time to move onto the next step in your project.


 2
2


- 16