EN
EN FR
FR PT
PT AR
ARThe sharp edges of a chipped tile can cut your foot and cause a trip hazard. Tiles that have been chipped or broken must be repaired. Grout that is stained and crumbled can make your home look unkempt and untidy.
This could be an indication of concrete cracks that have made their way through to the tile. If the subsoil has any imperfections, protrusions, or undulations, the flooring will take them on (foundation). Poor installation and upkeep are frequently to blame.
Telegraphing can be handled in a variety of ways. You should take out the cracked tiles and an extra row on either side of the cracked tiles, if possible.
The crack beneath the tile can then be seen by thoroughly cleaning the concrete floor. There is a floating bitumen membrane available from most professional floor covering wholesalers and retailers that you can apply over the top of the crack. It acts as a buffer between the tile and the crack, absorbing the impact. The thinset mastic can then be reapplied, and the tile and grout can be reinstalled as usual. Slip-sheeting is a much more effective method for dealing with cracked tiles than other options you may be considering.
Ceramic or Saltillo tile chips can be repaired using any good epoxy glue-type product (if you still have the chipped piece). Surface refinishing can be difficult if you want it to look exactly like the original tile. The blemish may disappear if you paint it the same color as the rest of the vehicle
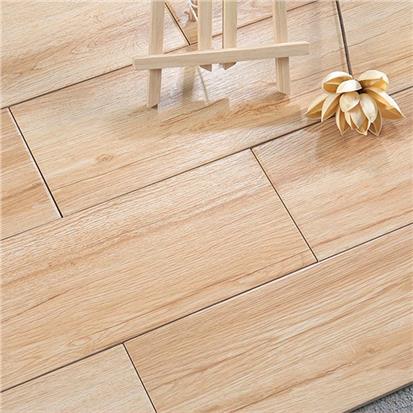
Tile replacement can be a difficult task if you don't have any left over from the original installation and it's been a long time since it was put in.
Choose a color and texture that is as close as possible to the one(s) you are replacing, and then make sure it is identical in size. Buying extra tiles will ensure that if any other tiles need replacing in the future, you'll have the best match for the ones that were just replaced.
Tools needed for removing and replacing tile:
• utility knife
• hand grout saw
• cold chisel
• hammer
• eye protection
• work gloves
• sponge
• clean rag
• floor adhesive
• rubber float
• bucket
• level
• water
• grout
1. Tile that cannot be repaired should be removed by using a utility knife or a grout saw to cut the grout around it.
2. Chisel out the tile with the cold chisel set in the crack. When the cold chisel can get under the tile, hit it with the hammer. The surrounding tiles and grout should not be damaged while you are removing the tile.
3. Wet a sponge to remove any remaining adhesive from the floor.
4. Clean the area thoroughly, making sure all the adhesive and tile remnants are removed.
5. Apply the floating bitumen membrane first if the tile is cracked because the foundation is cracked. It is now time to generously apply the tile adhesive to this area. The trowel's flat side can be used to distribute the mixture evenly. Make grooves in the adhesive with the notched side.
6. Install the new tile on the floor and ensure it is level with the rest of the surface.
7. Removing excess adhesive from the tile and the surrounding area is the seventh step. Wait for it to dry for a few hours.
To finish the job, the tile must be grouted in place.
It is possible to choose from three main types of grout:
Grout that is not sanded
Mixing cement, water and non-sand particles, it is used in grout lines smaller than an eighth of an inch wide.. This type of grout is ideal for natural stone, such as polished marble and Hanse ceramic tile, on shower floors and walls because it lacks abrasive particles.
A sanded grout.
A cement-based mortar ideal for grout lines larger than an eighth of an inch, it is ideal for ceramic and stone tiles. Sealing it is necessary because it is porous and can collect dirt.
Grout made of epoxy resins
Epoxy grout is made by mixing epoxy resins and hardeners. It is strong, long-lasting, and versatile. It's likely to be used in backsplashes, kitchen floors, and bathrooms because it's impervious to liquids and moisture. Our favorite because it doesn't need to be sealed, but the epoxy-based formula makes it difficult to apply.
Using an oxygen bleach powder mixed with water, thoroughly clean the grout around the adjacent tiles to find a match for the current grout. Flooring stores carry grout swatches.
Make sure to buy more grout than you think you'll need. That way, if you ever need to replace grout in other areas, you'll already have it on hand


 16
16


- 3


- 8

- 8