EN
EN FR
FR PT
PT AR
ARAre you looking for a way to add depth and texture to your walls? If so, 3D wall tiles may be the perfect solution. In this ultimate guide, we’ll cover everything from types of tile designs available, aesthetics considerations for different spaces in your home, and even step-by-step instructions on how to install them yourself! Read on to learn more about why 3D wall tiles are an excellent choice for sprucing up any space.
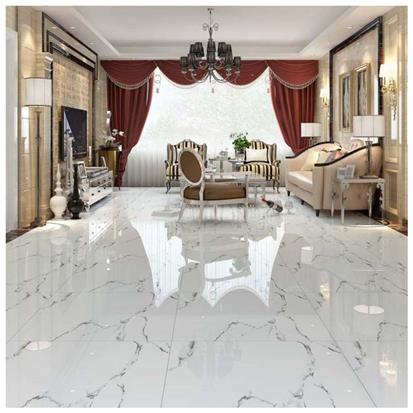
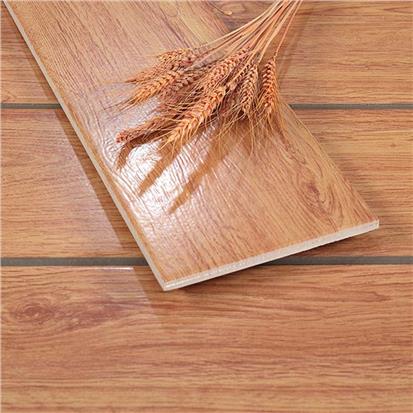
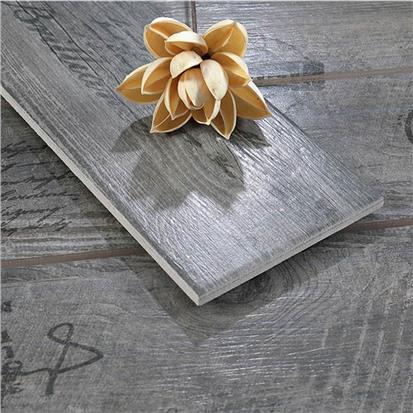
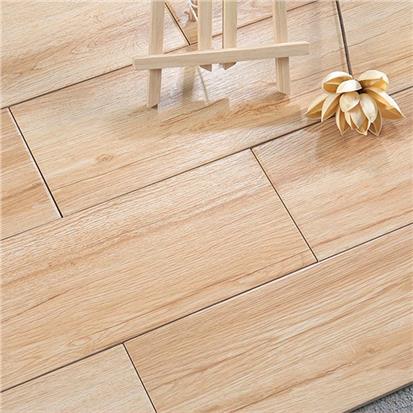
3D wall tiles bring life into any room with their unique shape and texture. They come in many varieties like metal or glass mosaic designs, natural stone options, or traditional ceramic/porcelain materials – all of which can create stunning visual effects when installed correctly. Not only that but they also offer great insulation value as well as being easy to clean & maintain over time making them a smart investment too!
![]()
Benefits and Advantages Of Using 3D Wall Tiles
There are many benefits associated with using these versatile products:
• Low cost - compared to other forms of decoration such as painting; installation costs will be much lower since no extra material is necessary
• Durable - due to its construction out of hard-wearing materials such as porcelain or ceramic; it’s resistant to scratches & chips thus lasting longer than most wallpaper solutions
• Easy cleaning & maintenance - because these surfaces don’t absorb dirt easily (unlike paint) regular dusting will keep them sparkling new without needing repainting every few years
• Thermal resistance – depending on the type chosen some models to have greater thermal properties than others which makes them ideal choices if energy efficiency is desired within certain rooms
Types Of 3D Wall Tile Designs
When it comes to selecting the right kind of tile design for your space, there are several options available. Each one has its own distinct set of pros and cons which should be considered carefully before making a decision. Here is an overview:
• Ceramic & Porcelain – These two materials are some of the most popular choices when it comes to tiling walls due to their durability, affordability, and wide range of colors/patterns available. The drawback with ceramic in particular is that it can easily chip or crack if not installed properly so ensure extra care during the installation process.
Pros/Cons: Durable, Affordable Wide Range Of Colors /Pattern Available, Easily Chip Or Crack If Not Installed Properly.
Installation Process: Ensure Extra Care During the Installation Process
• Natural Stone – Natural stone brings added richness and beauty into any space thanks to its unique textures, colors, and patterns. Though more expensive than other options listed here, natural stone provides great value over time because it will last longer without needing replacement like ceramics do after years of wear down from foot traffic, etc.
Pros/Cons: Unique Textures, Colors, And Patterns are More Expensive Than Other Options and Last Longer Without Needing Replacement.
Installation Process: Use an Adequate Amount Of Mortar To Set Stones Securely Into Place
• Glass – For those looking for something luxurious glass tiles offer a beautiful sparkle effect when light hits them however they require much more careful handling compared with other materialTile Designs Since they have sharp edges. One also needs special tools such as a diamond blade wet saw to install glass tiles correctly since regular ones won't work magic tricks on cutting rough surfaces like glass.
Pros / Cons: Beautiful Sparkle Effect When Light Hits Them Require Much More Careful Handling Special Tools Required Such As Diamond Blade Wet Saw
InstallationProcess: Use A Drill Hole Bit With An Appropriate Size That Matches The Screw Thread For Fixing To the Walls Surface
• Metal–Metal Wall Tiles come in various shapes and sizes offering plenty of creative potential for home designers who want something truly unique but still durable enough to withstand time's passage. Its low maintenance factor is another plus point metal won't leave stains behind as other materials may.
Pros / Cons: Low Maintenance Factor Creative Potential Won't Leave Stains Behind.
InstallationProcess: Using Appropriately Sized Nails Or Screws To Affix Metal Surfaces To Substrate Underneath.
Aesthetics Considerations for Different Spaces
Tiling is a great way to add an extra touch of style and color to any room. With the rise in popularity of 3D wall tiles, it's easy to see why they're becoming increasingly popular with homeowners everywhere. As one of the most versatile options available, these tiles can be used for both interior and exterior applications, making them ideal for creating stunning visual effects indoors or outdoors. So if you’re looking for some inspiration on how best to use this type of tile in your home then read ahead!
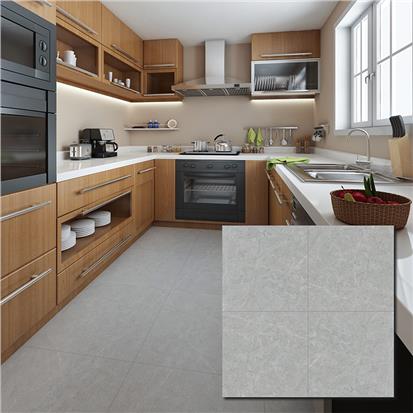
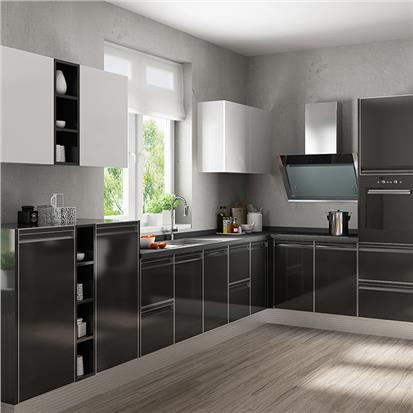
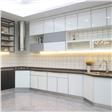
A . Kitchens:
Kitchens are often seen as the heart of many homes and choosing the right kind of tiling can help make this space feel even more inviting than before. Whether you want something bold that will draw attention or subtle enough not to overwhelm other elements within the kitchen; 3d wall tiling could be just what you need – adding texture whilst also giving off a modern vibe too! Additionally, they come in various shapes so depending upon your desired look there should be plenty to choose from - perfect when wanting to achieve maximum impact without compromising on quality either.
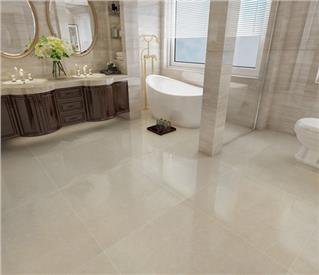
B . Bathrooms:
When it comes to bathrooms many people opt for traditional flat tiles which don't always give much character despite their practicality but thanks to advancements made within the industry now it's possible to get creative with our walls here too using three-dimensional designs instead! Not only do these offer greater depth providing us the opportunity to create a statement inside the bathroom yet their water-resistant properties mean that we won't have to worry about potential damage occurring over time due to humidity levels etc either- thus saving money in the long run by protecting against costly repairs in the future down line.
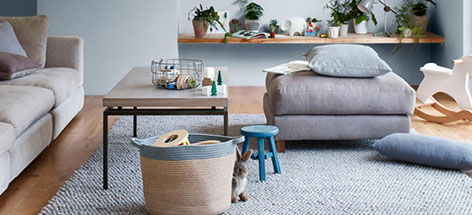
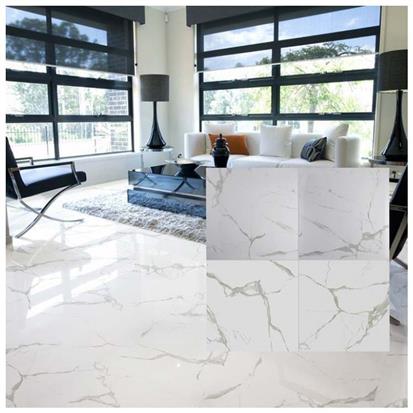
C . Living Rooms:
Finally, living rooms, where everyone relaxes at the end of the day, have stylishly designed walls become a priority, especially nowadays given the trend of contemporary décor is all the rage amongst discerning customers worldwide– enter again…3d wall tiles! These provide another dimension of detail into space making sure wherever you place yourself guests alike never miss out luxury experience offered by each piece chosen finishes off a look perfectly! From classic stone effect marble to unique patterned pieces there is something that suits every homeowner’s taste allowing them to express themselves freely while enhancing the overall aesthetic area no matter the size shape layout might take form wise.
How To DIY 3D Wall Tiles
1. Introduction: Installing 3D Wall Tiles
Installing wall tiles can be a daunting task for homeowners who are unfamiliar with the process, but luckily it doesn’t have to be complicated! In this guide, we will show you step-by-step how to install your 3D wall tiles and provide tips on achieving professional results. With a few tools and some patience, you'll soon see that even an inexperienced DIYer can create beautiful walls by installing their own unique 3D tile designs. Let's get started!
2. Preparing Your Space
Before beginning any installation project, it is important to ensure all surfaces are properly cleaned and prepared for tiling work. First, remove any furniture or appliances from the area in which you plan to install your new 3D tiles as they may interfere with your progress if left in place during construction. Next use warm water mixed with detergent or soap solution on the surface of where you want to apply the tile before rinsing clean with fresh water afterward; this will help loosen dirt particles that could impede adhesion between materials later down the line when applying adhesive mortar. Finally, wipe everything dry using paper towels so there won't be any extra moisture present while working--this is especially crucial since many types of three-dimensional (3D) ceramic flooring require ample time curing after being applied due to its weighty nature combined w/ potential grout lines created around them too!
3. Choosing Your Tools & Materials
Choosing quality materials makes all of the difference when completing home improvement projects like installing 3d wall tiles - particularly because these kinds of installations often involve intricate details such as cutting edges at angles or drilling holes into hard stone substrates; thus selecting proper equipment beforehand becomes paramount towards success here! As far as basic supplies make sure to grab yourself plenty of sponges/cloths along w/ rubber gloves & safety glasses then pick up either latex-based mastic glue specifically designed for wet areas including showers etc OR opt instead one made out of polyurethane resin better suited drier conditions like bedrooms kitchens etc next add bucket ready mix thin set mortar powder + mixing paddle stirrer combination come together to form fluid consistency perfect application onto the existing substrate prior laying individual pieces atop without worrying about inconsistencies thickness other factors affecting adherence rate over the long run ...oh yeah don forget bag premium grade sanded grout complete look once whole thing dried off finished up right...and voila! You've now equipped enough to tackle the job head with zero hassle ;)
4 . Laying Out The Tiles
Once everything has been prepped correctly begin laying out the pattern, desire take note however certain variations patterns might necessitate more complex cuts than others depending upon the design chosen instance herringbone chevron triangle shapes call attention to the placement of each piece in a particular order to achieve the desired effect of spacing also key factor consider the need to leave room expansion contraction contractions to occur naturally thanks humidity temperature changes environment surrounding structure itself If unsure whether planning accordingly refer manufacturer instructions provided purchase avoid problems down road…
After deciding the direction and wish proceed to determine the amount of coverage needed to calculate the total square footage necessary measure the space twice cut once finally mark off sections to allow easier distribution of sections larger than size single sheet to adhere to best results preferably break apart smaller ones and align evenly throughout the region starting farthest corner first gradually moving closer center point until reach completion … Sweet Now well past halfway done let the pieces assemble their good deal!!
5 . Applying Adhesive Mortar And Grouting
Once become familiar layout system used comes the sticking part brings life This requires a special type of material known as mastic cement “mortar” basically a blend of polymer resins available in tube liquid form applicable to both porcelain ceramic surfaces alike Despite appearing thick viscosity forms almost paste assure easy spread Apply generous layer backside sheets press firmly against base making contact possible gaps. Avoid skimping here since doing so may weaken the bond and otherwise durable construct To cover the entire surface simply drag float across the top keep uniform depth coatings wait at least 24 hours, before proceeding next step namely adding sealant secure hold additional security sake only While waiting prepare a mix containing portion powdered cement couple gallons cold tapwater stirring constantly achieve consistent texture resembling peanut butter. Ultimately should be able easily to manipulate fingers to free lumps remaining inside the mixture。 Allow the concoction to sit for several minutes to settle and finish the dispersion of particles solids Prepare another batch same fashion and separate the container adjacent to make cleaning brushes simpler latter stages project eventually through layering two batches shall gain a nice protective coating waterproof serve to protect the underlying layers dampness longer period times…. Now start filling in the space previously outlined, lightly press down to fill a small amount, try to remove air bubbles under the sieve, sand grout, fine mesh cloth, and cotton fabric, remove mess, remove excess residue, and check after.
The final product ascertain did indeed achieve the objectives outlined initial phase course always wise double check measurements respective dimensions conform to regulations standards specific jurisdiction falls under satisfied overall outcome mission accomplished Congratulations !!
How To Clean Walls for a Sparkling Home
Are your walls looking dull and dingy? Don’t worry—there are easy maintenance tips you can use to keep them sparkling! Here are some ideas on how to clean walls to maintain their beauty:
• Start by vacuuming the entire wall surface with an attachment that has soft bristles, such as a dust brush or upholstery tool. This will remove any loose dirt and debris from the wall.
• Next, mix mild dish soap with warm water in a bucket until it forms suds. Dip a microfiber cloth into the mixture then wring out most of the liquid so that it is damp but not dripping wet before cleaning each section of the wall one at a time using small circular motions until all sections have been cleaned thoroughly. Rinse off excess soap with plain water after each section has been cleaned; this ensures no streaks remain behind once dry. Allow enough time for everything to dry completely between steps if needed (note: never allow moisture build-up when cleaning).
• For tougher stains like crayon marks or grease spots, create baking soda paste or vinegar solution and spread over the affected area(s) before wiping off gently with dampened cloth afterward; repeat the process if necessary by mixing fresh solution every time used - avoid scrubbing too hard as this may damage paintwork/wallpaper underneath! Lastly don't forget about those corners where cobwebs accumulate easily – vacuum these areas regularly using the crevice tools available which help reach deep inside cracks & crevices without having to strain yourself too much while doing so!
Now enjoy a fabulous newly renovated room thanks to hard work and patience Using decorative three-dimensional paneling adds texture and dimension to style home even without professional experience and effortless job Upkeep minimal simple cleaning routine to prevent deterioration over years come to Enjoy result in proud owner stunningly attractive interior design features.


 16
16


- 3


- 8

- 8