EN
EN FR
FR PT
PT AR
AR
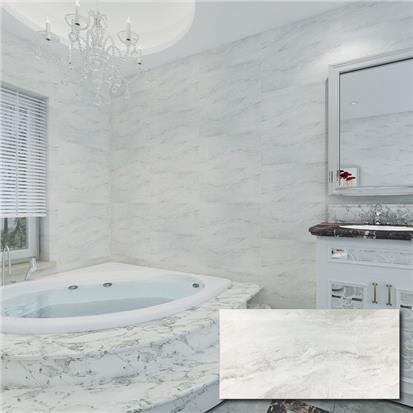
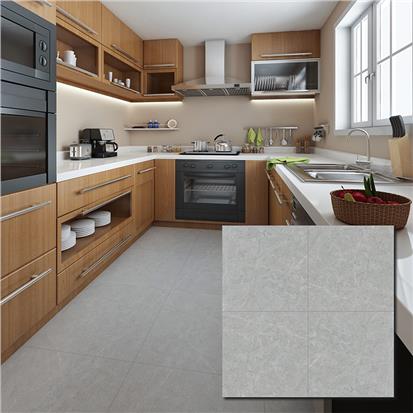
Installing tile flooring in your living room is an excellent way to add a touch of style and elegance to the space. Doing it yourself can be cost-effective, but requires some knowledge of installation techniques. Completing this project will provide you with satisfaction from having completed it yourself, as well as increased property value if you choose to sell your home down the road. In this blog post, we'll discuss all the steps necessary for installing tile flooring in a living room setting.
Preparation and Supplies Needed
A. Measurement and Planning
Measure Room Size: Measure the length and width of the room to determine how much tile and underlayment you'll need.
Determine Pattern or Layout: Decide on the layout and pattern of the tile before beginning installation. Consider factors such as the size and shape of the room, furniture placement, and the overall style of the room.
Select a Type of Tile: Choose a type of tile that fits your style and meets the practical needs of your living room.
B. Gather Necessary Supplies
Tiles: Purchase enough tiles to cover the entire living room, plus a few extras in case of damage during installation.
Grout: Select a color of grout that complements the color of the tiles.
Mortar: Choose a type of mortar that is suitable for the type of tile you've selected.
Tools: Gather necessary tools such as a trowel, sponge, level, saw, and other materials required for the installation process.
C. Remove Old Flooring (if applicable)
Take Out Furniture: Remove all furniture and items from the living room before beginning the removal process.
Scrape off Any Glue or Residue: Remove any glue or residue from the subfloor using a scraper or sandpaper.
D. Prepare Subfloor
Clean the Surface Thoroughly: Thoroughly clean the subfloor using a broom, vacuum, or mop.
Patch any Cracks/Holes: Fill in any cracks or holes in the subfloor using a patching compound.
E. Laying Down an Underlayment
Lay down an underlayment to create a smooth and stable surface for the tile. Cut the underlayment to fit the dimensions of the room and secure it in place.
F. Mark Placement Lines on Subfloor
Use a chalk line to mark placement lines on the subfloor. This will help ensure that the tile is laid down evenly and in the desired pattern.
Installing tile flooring in your living room is a project that can be completed successfully with proper planning, preparation, and the right tools. By following these steps, you can achieve a beautiful and durable floor that will enhance the overall aesthetic of your home.

An Installation Process:
A). Begin From Center Point: Start the installation process by finding the center point of the room. Measure the length and width of the room, and mark the center point with a chalk line.
B). Lay Individual Tiles: Start laying individual tiles from the center point outwards, following the chalk line. Use tile spacers to keep the tiles evenly spaced.
C.) Spread Adhesive onto the Back of the Tile: Apply adhesive onto the back of each tile using a notched trowel. Spread the adhesive evenly, making sure there are no air pockets.
D.). Place tile on the floor with spacers: Press the tile onto the floor, making sure it is level with the surrounding tiles. Insert tile spacers between the tiles to maintain even spacing.
E.) Tap Each Piece to Secure it in Place: Use a rubber mallet to tap each tile lightly, ensuring it is secured in place.
F ). Cut the Last Pieces With a Saw if needed: Use a tile saw to cut the last pieces to fit in the remaining space along the walls or edges of the room.
G.) Let Dry Overnight before Moving On to the Next Step: Allow the adhesive to dry completely overnight before proceeding to the next step.
H). Apply Grout Between Tiles: Mix the grout according to the manufacturer's instructions. Apply the grout using a rubber float, spreading it over the tiles and pressing it into the gaps between them.
I.). Wipe Off Excess Using Sponge: After the grout has been set for a few minutes, use a damp sponge to wipe off any excess grout from the tiles.
J.) Seal Entire Area After 24 Hours: Allow the grout to dry for at least 24 hours before applying a sealant to the entire area to protect it from moisture and stains.
K). Replace Furniture as Desired: Once the sealant has dried, you can move your furniture back into the room and enjoy your new tiled floor.
In conclusion, installing tile floors yourself is easy to do with a little knowledge and some careful planning. By following all the steps above, you can successfully install beautiful and durable floors without breaking the bank! The reaped benefits include increased satisfaction with your DIY tile flooring project, higher property value if you decide to sell your home, and increased aesthetic space due to the quality workmanship in the installation process itself!


 2
2


- 16